PaySpot Docs
Client setup playbookBack to PaySpot

Omada OpenAPI Setup

Client self-setup playbook

Fast path: create OpenAPI app, collect 5 fields, paste in PaySpot, run the health test.

5 required fieldsSave blocked if incompleteTest before go-live
In Omada: Global ViewSettings Platform IntegrationOpen API Add New App (choose Client mode).

Common Client Starting Screen

  • Many client controllers first open at Global View with Cloud Access connected and a Site List table.
  • From that screen, use the left menu: Settings -> Platform Integration -> Open API.
  • The Global View screen confirms the controller is reachable, but the exact version and Open API menu still need to be checked.

Before You Start

  • You can log in to Omada Controller with admin privileges.
  • You know which Omada site is your live hotspot site.
  • You can open PaySpot tenant admin at /t/<slug>/admin.

Where To Click

  • - PaySpot: /t/<slug>/admin -> Quick actions -> Configure architecture -> Voucher source = omada_openapi.
  • - Omada: Global View -> Settings -> Platform Integration -> Open API.
  • - Omada app creation: Open API -> Add New App -> Client mode.

Visual Walkthrough

Omada create app screen with Client mode and permissions

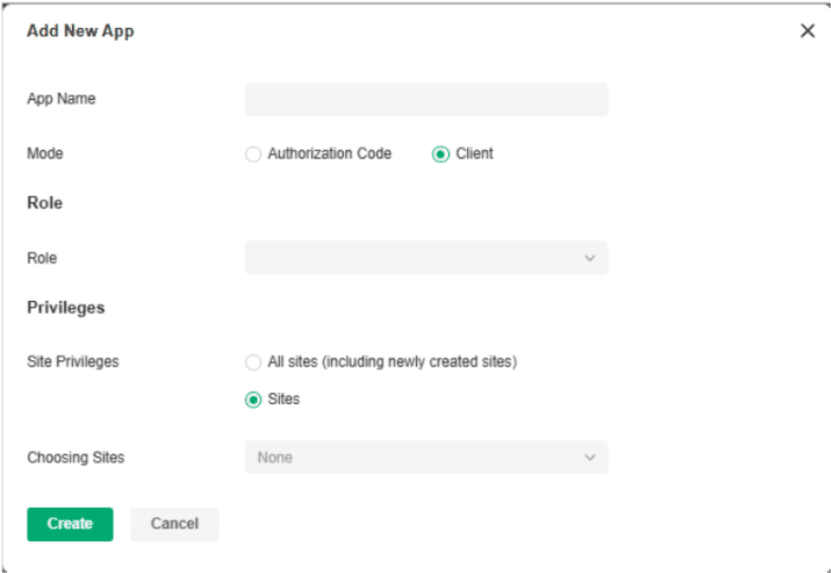
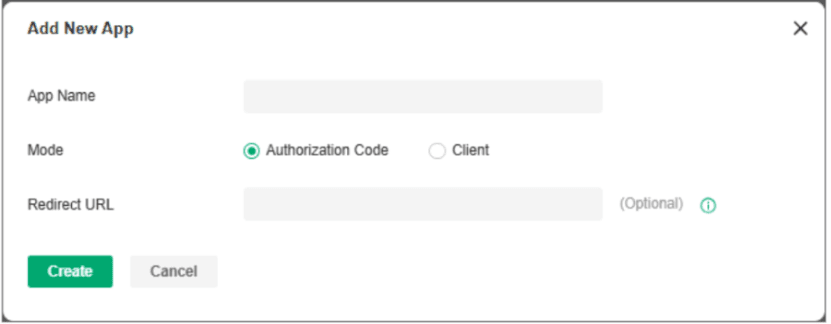
Create app form where Client mode and permissions are set.

Source image
Omada app detail showing generated credentials and identifiers

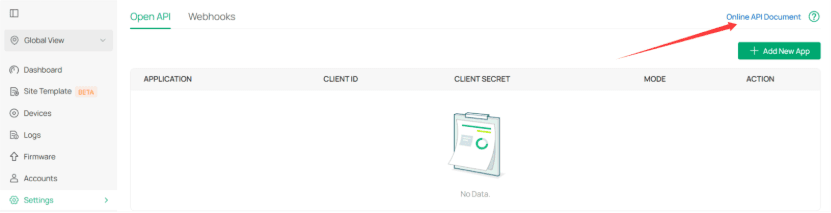
App details page where Client ID and other fields are copied.

Source image

API Base URL

https://use1-omada-northbound.tplinkcloud.com

Use your Omada northbound domain (same region as your controller).

Omada ID

xxxxxxxxxxxxxxxx

Controller identifier shown in Omada Global View / OpenAPI examples.

Site ID

xxxxxxxxxxxxxxxx

Target site identifier under your controller.

Client ID

xxxxxxxxxxxxxxxx

Generated after creating an OpenAPI app in client mode.

Client Secret

****************************************

Generated with the client ID; keep private.

Step-by-Step

  1. 1. Open OpenAPI settings in Omada: In Omada Global View, go to Settings > Platform Integration > Open API.
  2. 2. Create a new OpenAPI app: Click Add New App, select Client mode, assign permissions for hotspot/voucher actions, and include the correct site privilege.
  3. 3. Copy credentials immediately: Save the generated Client ID and Client Secret. Treat Client Secret like a password and share it securely only.
  4. 4. Paste values into PaySpot architecture: In PaySpot tenant admin, open Configure architecture and set Voucher source = omada_openapi.
  5. 5. Run connection test before going live: Click Test Omada connection. If it passes, save settings and perform one real test purchase.

Omada To PaySpot Field Mapping

  • Northbound URLAPI Base URL
  • Omada controller identifierOmada ID
  • Target hotspot site identifierSite ID
  • OpenAPI App Client IDClient ID
  • OpenAPI App Client SecretClient Secret

Quick Validation Checklist

  • Controller supports OpenAPI and OpenAPI is enabled
  • OpenAPI app is created in Client mode
  • App role has voucher/hotspot permissions
  • Site privilege includes the site used in PaySpot
  • You can pass the PaySpot ‘Test Omada connection’ button

Common Errors And Fixes

  • Missing required Omada fields: Fill all five required fields in Configure architecture and save again.
  • Omada connection test failed: client credentials: Regenerate Client Secret in Omada and paste the new value in PaySpot.
  • Omada connection test failed: site: Confirm Site ID is correct and that your OpenAPI app has access to that site.
  • Payment succeeds but voucher unavailable: Run Test Omada connection again and verify hotspot/voucher permissions are still active.
References: TP-Link Omada community guide for OpenAPI setup and access flow.