Captive Portal Page
Custom Omada portal page for PaySpot
Use a custom portal when the first screen on the hotspot should guide customers to buy a voucher, log in, or return to Omada after PaySpot account authentication.
Option A: Omada voucher page + PaySpot purchase link
- Use Omada voucher authentication.
- Keep the Omada voucher input visible so customers can enter the code after payment.
- The PaySpot downloaded HTML includes the voucher input and submits voucherCode to Omada.
- Add a Buy Voucher link that opens https://payspot.abdxl.cloud/t/<tenant-slug>.
- Use CSV Import or Omada OpenAPI to keep PaySpot voucher stock available.
- Configure the Omada pre-authentication access list for PaySpot and Paystack.
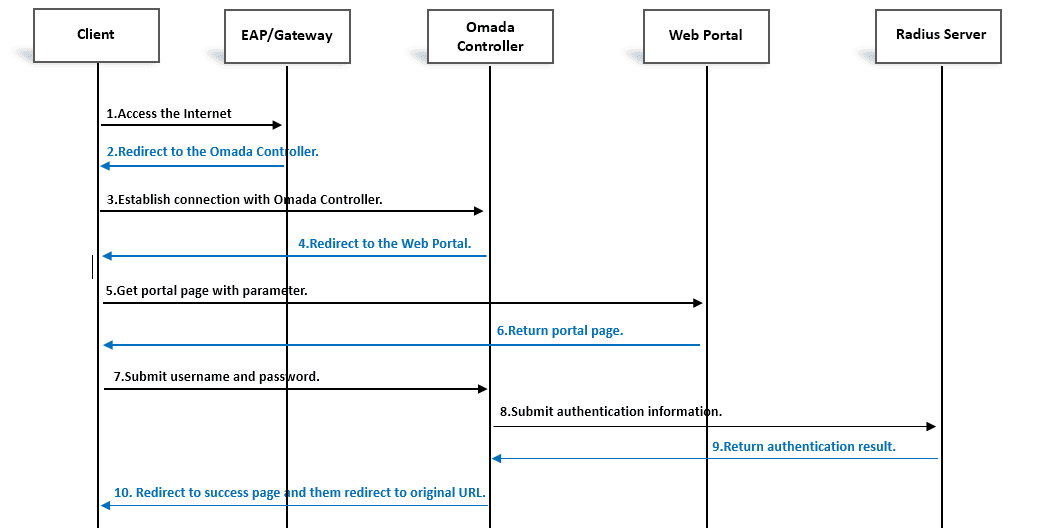
Option B: External Web Portal + RADIUS account access
- Use Omada Authentication Type = RADIUS Server.
- Set Portal Customization = External Web Portal.
- Set External Web Portal URL = https://payspot.abdxl.cloud/t/<tenant-slug>.
- Set Landing Page = The Original URL when users should return to the site they first opened.
- Connect an external RADIUS service or adapter to PaySpot RADIUS endpoints.
Import PaySpot location HTML
- Open the tenant dashboard and go to Locations.
- Click Download HTML on the location card.
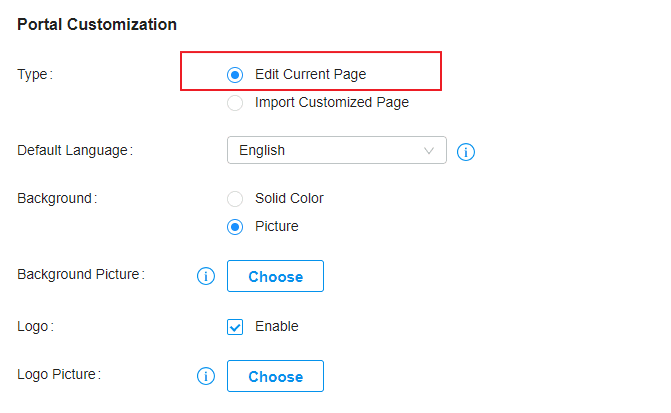
- In Omada, edit the voucher portal for the live site.
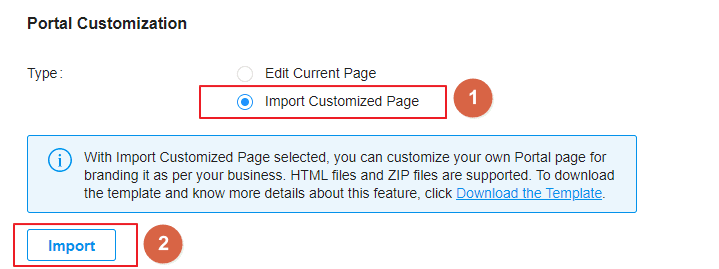
- Choose Portal Customization = Import Customized Page.
- Upload the downloaded HTML file, then Save and Apply.
Relative links for custom zip uploads
- Use index.html as the main page.
- Put images, CSS, and JS inside the zip.
- Reference local assets with relative paths such as ./logo.png or assets/style.css.
- Keep external links only for actions like Buy Voucher, then allowlist those hosts.
Official Omada Screenshots
Simple Buy Voucher link
Use this only when editing Omada's current built-in page. If you replace the whole page, use the PaySpot downloaded HTML or keep Omada's voucher submit script.
<a href="https://payspot.abdxl.cloud/t/wallstreet">
  Buy WiFi Voucher
</a>
What to include on the custom page
- Show tenant name/logo.
- Keep the Buy Voucher button large and visible.
- Keep the Omada voucher login form visible if using voucher mode.
- For imported HTML, keep Omada's /portal/auth submit script for voucher authentication.
- Add support phone or WhatsApp.
- Test on Android and iPhone captive portal browsers.
Testing checklist
- Forget the WiFi network and reconnect fresh.
- Confirm the captive portal opens the custom page.
- Click Buy Voucher and confirm PaySpot loads.
- Start checkout and confirm Paystack loads.
- Complete payment and confirm the voucher/account result appears.
- Authenticate and confirm the phone can browse.
Do the access list first
The custom page can look perfect and still fail if the captive network blocks PaySpot or Paystack. Configure the Omada access list before testing payment from a captive phone.
Open the Omada access list guide